Hosting a Directory
This guide will explain how you can host a Directory on a Kubernetes cluster. The basis of this guide is the try-fsc helm guide.
The Directory is a Manager which is used by other Peers as a discovery point of the Group. Peers can use the Directory to discover the Peers and Services of the Group.
Peers announce themselves to the Directory by calling the announce endpoint of the Manager acting as Directory.
Peers can publish Services in a Directory by offering Contracts containing a Service Publication Grant. The Peer hosting the Directory will have to sign these Contracts.
After the digital accept signature has been placed the Service will be published in the Directory.
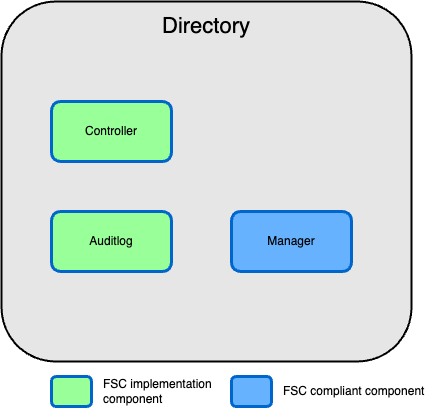
When acting as a Directory not all the components available in the FSC reference implementation need to be installed. The main component required is the Manager. The Controller and Auditlog are optional components that can be installed. The Controller offers a graphical UI for managing Contracts and the Auditlog component keeps an auditlog of all activity of the Manager.
Installation
As said before the basis of this guide is the try-fsc helm guide.
To host a Directory not all steps of the guide are required. Please execute only the following steps:
- 0 Preparation
- 1 Create Namespace
- 2 Create Certificates
- 3 Install PostgresSQL
- 5 Install the Audit Log
- 6 Install the Controller
- 7 Install the Manager
Some steps will deviate from the original steps. In the next sections you will find the deviations per step. Review these deviations carefully since they are essential for a fully functional Directory.
Step 2 Create Certificates
When creating the external certificate the script will ask for both a Manager address and an Inway address. Since an Inway is not required when acting as a Directory please re-use the Manager address as Inway address. The shell command to create a Kubernetes secret for the Inway can be skipped.
Step 3 Install PostgresSQL
This step asks you to create several database for the different components. Since not all the components are required the creation of the database fsc_txlog for the transaction log can be skipped.
Step 6 Install the Controller
This step asks you to open the controller-values.yaml and edit it. In addition to the changes required in step 6 you will also need to update the directoryManagerAddress value from https://directory.demo.fsc.nlx.io:8443 to https://<the hostname of your manager>:8443. Be sure to substitute <the hostname of your manager> with the actual host name of your Manager. The hostname of your Manager must be identical as the address used in Step 2 when creating the Certificates.
Step 7 Install the Manager
This step asks you to open the manager-values.yaml and edit it. In addition to the changes required in step 7 you will also need to update the directoryManagerAddress value from https://directory.demo.fsc.nlx.io:8443 to https://<the hostname of your manager>:8443. Be sure to substitute <the hostname of your manager> with the actual host name of your Manager. Again, this hostname must be the same as used in Step 2 when creating the Certificates.
Remove the line txLogAPIAddress: https://txlog-api-fsc-nlx-txlog-api:8443 because a Directory does not require a Transaction Log.
Additional configuration
One of the tasks of the Directory is to sign Contracts with a (Delegated) Service Publication Grant. These Contracts are required to publish Services in the Directory.
As Directory, you might want to automate this process when, for example, no additional verification is required before publishing a Service.
This is possible by setting the autoSignGrants value of the Helm chart of the Manager.
To auto-sign Contracts with a (Delegated) Service Publication Grants add the following setting to manager-values.yaml:
config:
  autoSignGrants:
    - "servicePublication"
    - "delegatedServicePublication"